Ever wanted a DIY bolster pillow from your old towels? Well, look no further!
Times change, and so do people. Trends change, then why not your home décor?
It’s time to upgrade your home space with the addition of a funky, traditional bolster fabric pillow DIY style.
A bolster fabric pillow is a long and narrow pillow or cushion filled with stuffing made from cotton, down or fibre. They have been used as arm support on a luxurious sofa, or as a backrest on a mighty rocking chair.
Nowadays, you often find them in the bedroom, and they have become an eye-catching decorative home furnishing artefact. You can always change the bolster fabric pillowcase to match your seasonal décor. In addition, you can add drama to the mundane home space. Not only is it versatile, but it brings comfort and pain relief to its users.
Towels are vital beach and bathroom accessories every house makes use of. Today we will show you how to construct an inexpensive DIY Bolster Pillow using old towels in your home. This is a DIY project that you can do in no time. Follow our steps to learn how to make a bolster pillow!
Steps to a DIY Bolster Pillow From Old Towels
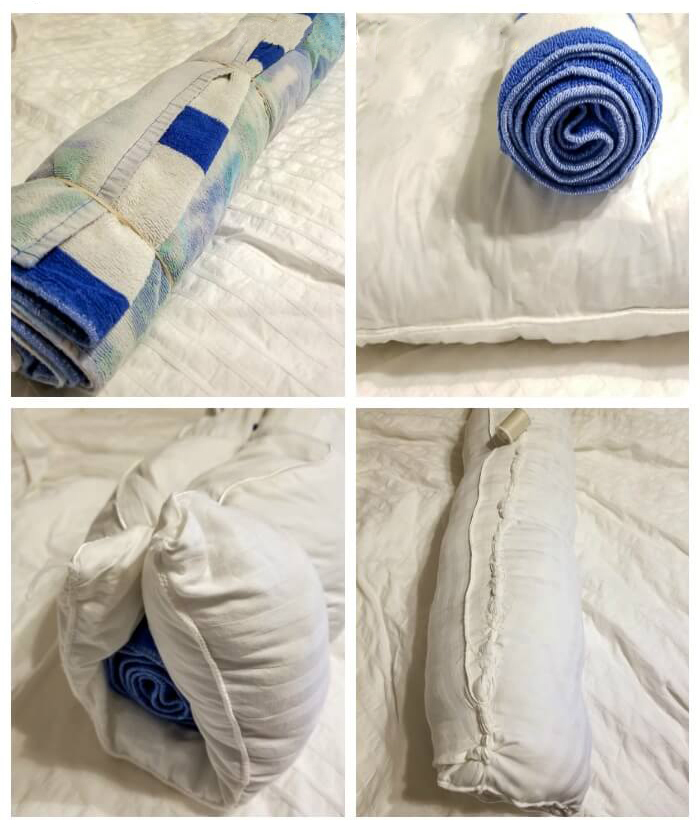
Step 1: Gather Old Towels
Bring out all the tattered and old towels you have been secretly hoarding for months—stack one towel over the other. Roll up the towels tightly as if you are packing a sleeping bag. Secure the rolled-up stack with the help of rubber bands or elastics.
Suppose you want to make wider bolster pillows stack more towels as needed. For normal-sized bolster pillows, insert use of one or two thick towels is more than enough.
Step 2: Find A Flat Worn Out Pillow
Make use of an old flat pillow to wrap in the towel roll. Use rubber bands to secure the pillow.
Step 3: Create And Stabilise The Bolster Pillow Insert
Use a large sewing needle and thick quilting thread to hand stitch the bolster pillows firmly. You can also use a dacron sheet to wrap the entire pile and spray it shut with fabric adhesive.
Your Diy Bolster Pillow Insert is fully stabilised and ready to use.
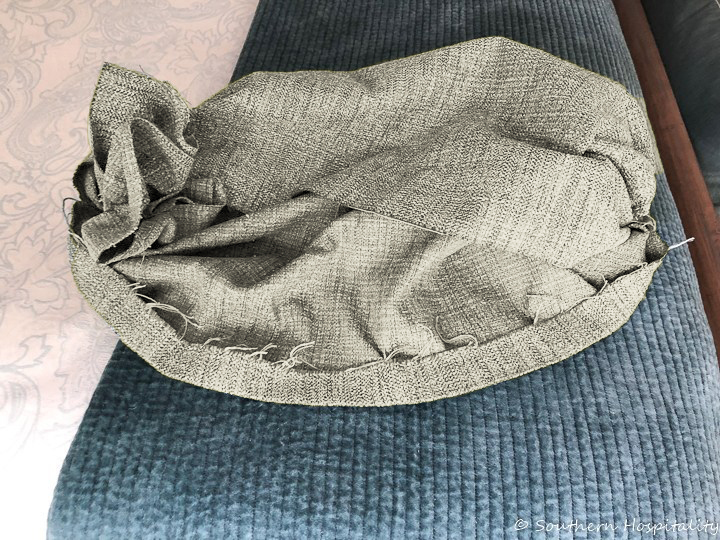
Step 4: Select An Upholstery Fabric For The Bolster Pillow Cover
Decide upon an upholstery fabric you are in love with to use for your DIY Bolster Pillow project. Ensure that the bolster fabric matches the furniture fabric you will place it on and other decorative elements in the room.
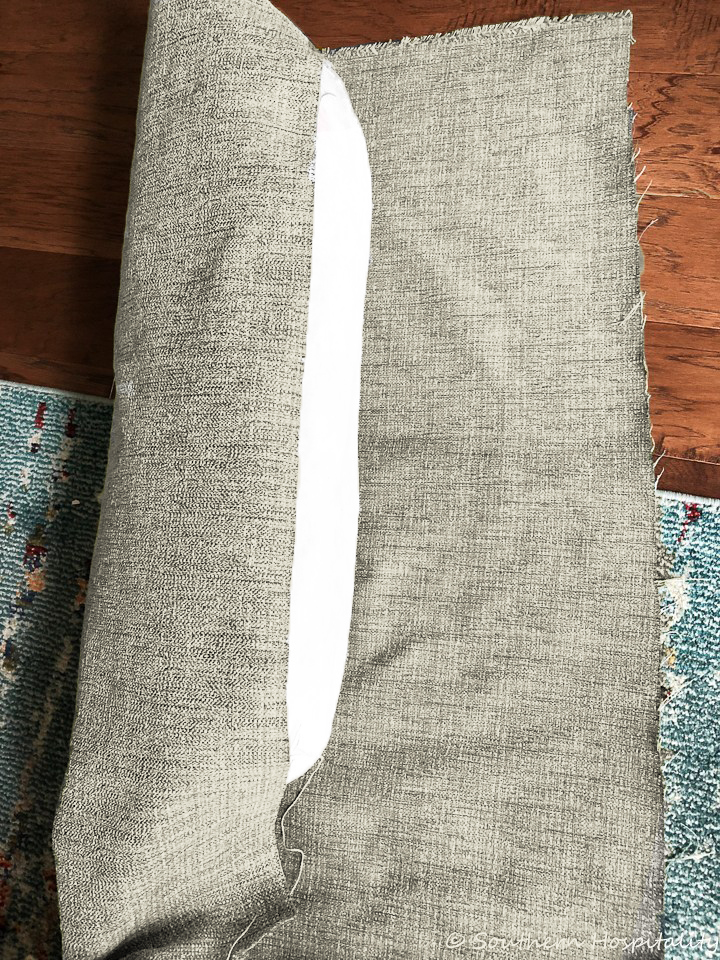
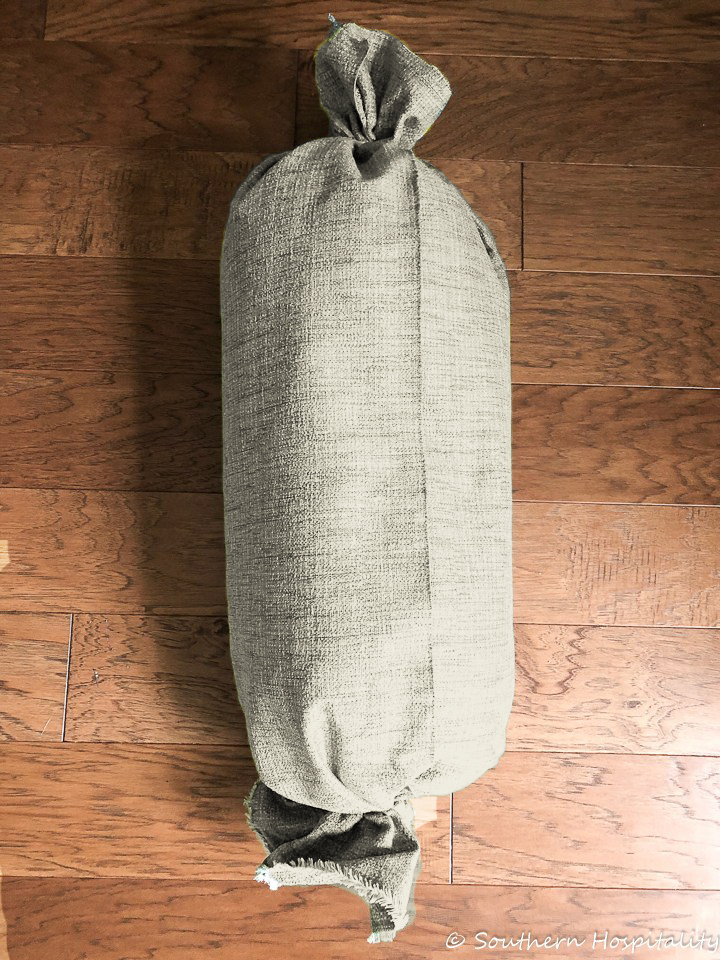
Step 5: Wrap The Homemade Bolster Pillow Insert
Lay the selected upholstery fabric on a flat surface with the inner side facing you. Place the Diy Bolster Pillow insert at the centre, ensuring there is enough free material at the sides of the pillow. Wrap the fabric material around the pillow insert like a sausage, the same way you wrapped the towels.
Use enough fabric to wrap around the insert several times so that the lumps are not noticeable.
Step 6: Secure The Bolster Fabric Pillow Cover’s & Melt The Edges
Grab the excess and secure the ends of the pillow cover on both sides with a couple of rubber bands. Lightly crop the overlapping edges of the bolster fabric at the ends with a scissor. Make use of a lighter to soften the cut edges of the fabric. It would be best if you did this quickly without letting the flame stay longer; otherwise, it may burn the fabric. Just crimp the fabric fibres so that they do not fray on use.
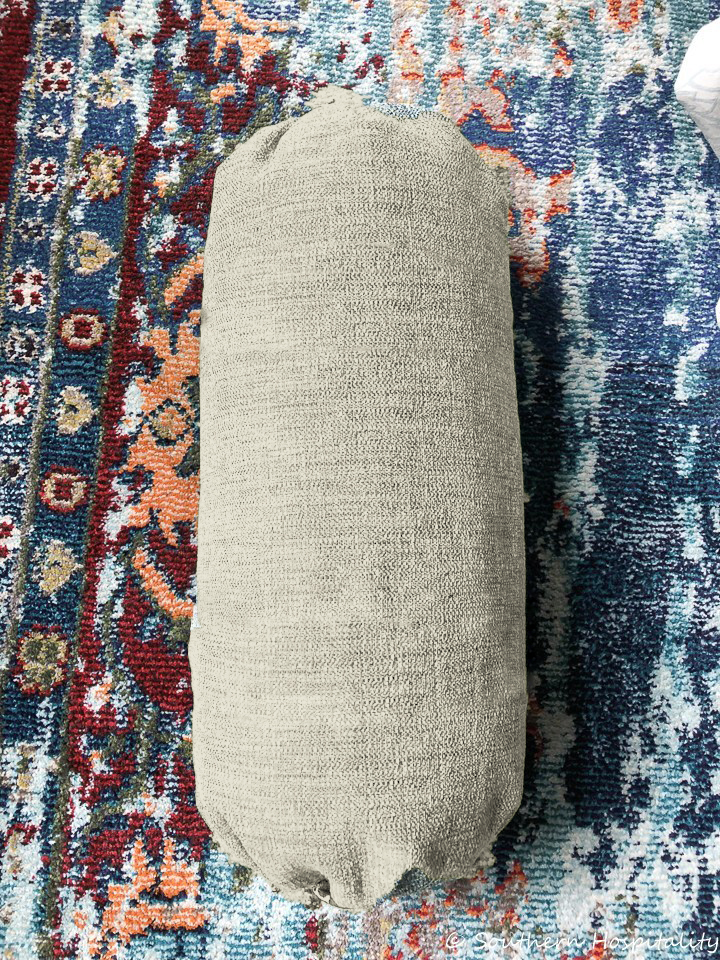
Step 7: Use Fancy Ribbons For Coverage
The ends of the pillow cover that have been secured with rubber bands should be concealed by the use of wide decorative ribbons to tie the ends.
Your dream DIY Bolster pillow in fabric has finally been fabricated!
The steps mentioned above are a no-sew method to create a bolster pillow. This is the best method for beginners and those unfamiliar with sewing machines.
Using A Sewing Machine
- First, you need to cut the upholstery fabric into three main parts
- rectangular main body fabric cut
- circular end circle fabric cuts
- The measurement of the main body fabric cut depends upon the circumference and length of the bolster pillow. The end circle fabric cut measurement relies on the width of the bolster pillow. To stitch the fabric pieces together, you have to keep at least a 1-inch clearance on all sides.
- Stitching the cut pieces together should be done with the fabric facing inside out. Doing this ensures the stitches are hidden internally.
- The two ends of the main body fabric cut should be left last to stitch. Flip the stitched fabric keeping the right-side out, insert the homemade bolster pillow towel foam inside the cover and hand-stitch the opening closed. You can also insert a zipper here to make closing easy.
- You can use cording at the two circular ends to conceal the stitching and make the pillow look decorative. Trims or fancy ribbons are used for extra décor.
Making Your Own DIY Bolster Pillow in Fabric
The DIY bolster pillow is easy to craft home décor. The stuffing does not need to be purchased commercially. It can be homemade from old shabby towels, as described to you. You only need to invest cash to buy gorgeous upholstery fabric for the bolster pillow cover. If you want to cut low, you can use home fabric scraps to make the pillowcase.
You can save precious money to craft bolster pillows from your dreams. Log onto Provincial Fabric House for selecting a beautiful upholstery fabric for your dream pillow today!
If you want to see see more ideas to bring into your home or space, have a look at our socials. Our Instagram and Pinterest are perfect for bringing areas to life. You can also reach out to our team anytime for further assistance.